

Powering dashcams in RVs with portable batteries is straightforward. It ensures your dashcam runs smoothly during your travels.
For RV enthusiasts, capturing every moment of your journey is essential. Dashcams offer security and record priceless memories. But keeping them powered can be a challenge on the road. Traditional power sources might not always be available or reliable. Portable batteries are a perfect solution.
They provide a stable and consistent power supply, ensuring your dashcam never misses a beat. This setup is especially useful for long trips or off-grid adventures. In this guide, we’ll explore the steps to effectively power your dashcam using portable batteries. It will help you enjoy a hassle-free travel experience. Ready to make the switch? Let’s dive in!

Credit: www.alibaba.com
Choosing The Right Battery
Powering dashcams with portable batteries in RVs is essential for continuous recording and safety. Choosing the right battery is crucial to ensure your dashcam operates efficiently. This guide will help you select the best battery by covering key aspects such as battery types, capacity, and voltage.
Types Of Batteries
There are several types of batteries to consider for powering your dashcam in an RV. Each type has its own advantages and disadvantages:
- Lithium-Ion Batteries: These are lightweight and have a high energy density. They charge quickly but can be more expensive.
- Lead-Acid Batteries: These are cheaper and widely available. However, they are heavier and have a lower energy density.
- Nickel-Metal Hydride (NiMH) Batteries: These are environmentally friendly and have a moderate energy density. They are not as lightweight as lithium-ion batteries.
- Absorbent Glass Mat (AGM) Batteries: These are a type of lead-acid battery that is more efficient and has a longer lifespan. They are more expensive than regular lead-acid batteries.
Here is a comparison table to help you understand the differences:
| Battery Type | Weight | Energy Density | Cost | Charge Time |
|---|---|---|---|---|
| Lithium-Ion | Light | High | Expensive | Fast |
| Lead-Acid | Heavy | Low | Cheap | Slow |
| Nickel-Metal Hydride | Moderate | Moderate | Moderate | Moderate |
| AGM | Heavy | Moderate | Expensive | Moderate |
Capacity And Voltage
Two critical factors in choosing a battery for your dashcam are capacity and voltage. The capacity determines how long the battery can power the dashcam, while voltage ensures the dashcam operates correctly.
- Capacity: Measured in milliampere-hours (mAh) or ampere-hours (Ah). A higher capacity means longer battery life.
- Voltage: Measured in volts (V). Ensure the battery voltage matches the dashcam requirements to avoid damage.
Consider the following points when evaluating capacity and voltage:
- Calculate the dashcam’s power consumption: Check the dashcam’s specifications for power usage, usually listed in watts (W).
- Match battery capacity: Divide the battery capacity (in mAh) by the dashcam’s power consumption to estimate how long the battery will last.
- Ensure voltage compatibility: Confirm the battery voltage matches the dashcam’s operating voltage. Most dashcams operate at 12V, but always check the specifications.
Below is an example calculation for a 12V dashcam with a power consumption of 5W and a battery with a capacity of 20,000mAh:
Power consumption (W) = 5W
Battery capacity (mAh) = 20,000mAh
Battery voltage (V) = 12V

Battery life (hours) = Battery capacity (mAh) / (Power consumption (W) / Battery voltage (V))
Battery life (hours) = 20,000mAh / (5W / 12V) = 48 hours
This means the battery can power the dashcam for approximately 48 hours. Always choose a battery with sufficient capacity and the correct voltage to ensure reliable operation of your dashcam.

Credit: www.amazon.com
Dashcam Power Requirements
Using dashcams in RVs helps to capture essential moments and ensure safety on the road. To keep these cameras running smoothly, understanding their power needs is crucial. Dashcam power requirements include specifications for voltage and current draw. This knowledge helps in selecting the right portable batteries to maintain continuous operation.
Voltage Specifications
Dashcams typically operate within a specific voltage range. Most dashcams run on 5V or 12V power. It is important to check your dashcam’s manual for the exact voltage requirement.
Here are some common voltage specifications for dashcams:
- 5V: Often used for smaller, compact dashcams.
- 12V: Common for more advanced models with additional features.
Ensuring that the portable battery matches the dashcam’s voltage is vital. Using the incorrect voltage can damage the dashcam or cause it to malfunction. Always use a voltage converter if the battery voltage does not match the dashcam’s requirement.
Below is a table summarizing the voltage specifications:
| Dashcam Type | Voltage (V) |
|---|---|
| Basic Model | 5V |
| Advanced Model | 12V |
Current Draw
Current draw refers to the amount of current (measured in Amperes or milliamperes) a dashcam needs. Different models have different current draws, affecting battery life.
Here are typical current draws for dashcams:
- Basic Dashcams: 1A to 2A
- Advanced Dashcams with multiple features: 2A to 3A
To calculate how long a portable battery will last, use the formula:
Battery Capacity (mAh) / Current Draw (mA) = Runtime (hours)
For example, a 10,000mAh battery powering a dashcam with a 2A (2000mA) current draw:
Choosing a battery with a higher capacity will increase the runtime. It is important to monitor the battery’s charge level to prevent the dashcam from shutting down unexpectedly.
Portable Battery Options
Using portable batteries to power dashcams in RVs is a smart choice. It ensures continuous operation without draining the vehicle’s main battery. Portable battery options vary, catering to different needs and preferences. This guide will help you understand the differences between lithium and lead-acid batteries, and recommend some reliable brands.
Lithium Vs Lead-acid
Choosing between lithium and lead-acid batteries can be challenging. Each has unique benefits and drawbacks.
- Higher energy density
- Longer lifespan
- Lightweight
- Faster charging
These batteries are ideal for RVs due to their compact size and efficiency. They can power dashcams for extended periods, making them a preferred choice for long trips.
- Lower upfront cost
- Widely available
- Proven technology
Though heavier and less efficient than lithium batteries, lead-acid options are more affordable. They are suitable for short trips or budget-conscious RVers.
| Feature | Lithium | Lead-Acid |
|---|---|---|
| Energy Density | High | Low |
| Lifespan | Long | Medium |
| Weight | Light | Heavy |
| Cost | High | Low |
Battery Brands To Consider
Several brands offer reliable portable batteries for RV dashcams. Here are some top choices.
- Known for durability and performance
- Variety of sizes available
- Solar-compatible options
Goal Zero provides high-quality lithium batteries. They are ideal for extended use and outdoor enthusiasts.
- Offers both lithium and lead-acid options
- Competitive pricing
- Reliable customer support
Renogy is a trusted brand, offering a range of batteries to fit different needs and budgets.
- Specializes in lithium batteries
- Impressive lifespan
- Lightweight and efficient
Battle Born is a top choice for those seeking long-lasting and high-performance lithium batteries.
These brands provide reliable options for powering dashcams in RVs. Whether you prefer lithium or lead-acid, you can find a suitable battery to meet your needs.
Credit: www.walmart.com
Connecting Dashcams To Batteries
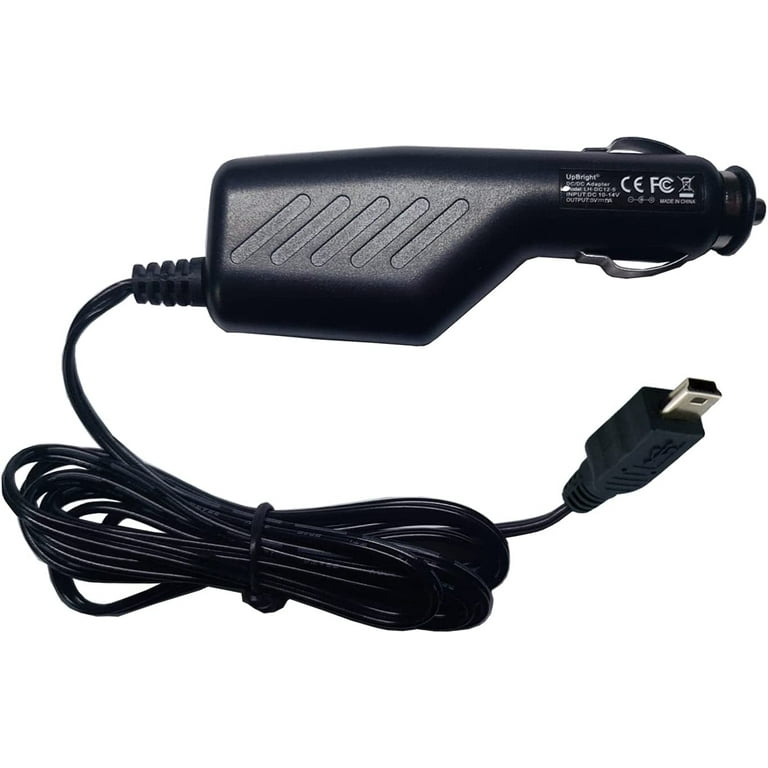
Powering dashcams in RVs with portable batteries is a practical solution for capturing your adventures on the road. Connecting dashcams to batteries ensures continuous recording, even when the vehicle’s engine is off. Proper connection is crucial to avoid any interruptions or damage. This guide will walk you through the essentials of wiring and the necessary safety precautions.
Wiring Essentials
Setting up your dashcam with a portable battery involves a few key steps. Understanding the wiring essentials will make the process smooth and efficient.
First, gather the necessary tools and materials:
- Dashcam with power cable
- Portable battery pack
- 12V adapter or DC-DC converter
- Wire connectors
- Electrical tape
- Wire cutter/stripper
Next, follow these steps to connect your dashcam to the battery:
- Identify the power input on your dashcam. Most dashcams use a mini-USB or micro-USB port.
- Connect the dashcam’s power cable to the portable battery pack.
- If your battery pack does not have a compatible output, use a 12V adapter or DC-DC converter.
- Ensure a secure connection using wire connectors. Use electrical tape to insulate exposed wires.
- Test the setup by turning on the battery pack and checking if the dashcam powers up.
Using a portable battery pack with a high capacity ensures longer recording times. Verify that the battery pack has enough output to power the dashcam without interruptions.
Safety Precautions
Taking safety precautions is vital when connecting dashcams to portable batteries. This prevents damage to your devices and ensures safe operation.
Here are some important safety tips:
- Check the voltage and current ratings: Ensure that the battery pack’s output matches the dashcam’s power requirements.
- Avoid overloading: Do not connect multiple high-power devices to a single battery pack. This can cause overheating or damage.
- Secure connections: Loose connections can cause short circuits. Use wire connectors and electrical tape to secure all connections.
- Monitor battery temperature: Portable batteries can heat up during prolonged use. Keep an eye on the temperature and disconnect if it gets too hot.
- Use protective gear: Wear gloves and safety goggles while handling electrical components.
Regularly check the connections and the battery pack for any signs of wear or damage. Replace any faulty components immediately to avoid potential hazards.
By following these wiring essentials and safety precautions, you can ensure a reliable and safe power setup for your dashcam in your RV.
Battery Management Systems
Using dashcams in RVs is a smart way to enhance security and document your travels. However, keeping these devices powered without draining your RV’s primary battery can be a challenge. This is where portable batteries come into play. A crucial component of this setup is the Battery Management System (BMS). The BMS ensures that your portable batteries are used efficiently and safely, helping you avoid potential problems like over-discharge and improper charging.
Preventing Over-discharge
Over-discharge can damage your batteries and reduce their lifespan. A Battery Management System helps prevent this issue by monitoring the voltage levels and cutting off power before the battery gets too low. Here’s how it works:
- Voltage Monitoring: The BMS constantly checks the battery voltage. If it drops below a safe level, the system disconnects the load to prevent damage.
- Automatic Shutdown: Some BMS units can shut down the battery when it reaches a critical level. This helps protect the battery from over-discharge.
- Alerts: Advanced systems send alerts to your phone or other devices, notifying you when the battery is close to being over-discharged.
To ensure your dashcams continue to operate without issues, consider using a BMS with these features. Here’s a simple table to help you understand the benefits of a good BMS:
| Feature | Benefit |
|---|---|
| Voltage Monitoring | Prevents battery damage by cutting off power |
| Automatic Shutdown | Extends battery life by avoiding over-discharge |
| Alerts | Keeps you informed about battery status |
Charging Solutions
Proper charging is crucial for maintaining the health of your portable batteries. The Battery Management System plays a key role in this process as well. Here are some charging solutions to consider:
- Solar Charging: Solar panels can be a great way to keep your batteries charged while off-grid. Connect the panels to the BMS, which will regulate the power going into the battery.
- Generator Charging: When you have access to a generator, use it to charge your batteries. The BMS will ensure the charging process is safe and efficient.
- Vehicle Alternator: Some BMS units allow you to charge your portable batteries using your RV’s alternator while driving. This keeps your dashcams running without draining the main battery.
Each of these methods has its pros and cons. Here’s a quick comparison:
| Charging Method | Pros | Cons |
|---|---|---|
| Solar Charging | Eco-friendly, renewable | Dependent on weather |
| Generator Charging | Reliable, fast | Requires fuel, noisy |
| Vehicle Alternator | Convenient, uses existing system | May strain vehicle’s battery |
Choosing the right charging solution depends on your needs and resources. With a good BMS in place, you can ensure that your dashcams stay powered, your batteries remain healthy, and your travels are documented without a hitch.
Monitoring Power Levels
Powering dashcams with portable batteries in RVs is a smart way to ensure continuous monitoring while on the road. One key aspect of using portable batteries is monitoring power levels effectively. Proper monitoring helps avoid unexpected power failures and ensures your dashcams are always operational.
Using Voltage Meters
Voltage meters are essential tools for monitoring the power levels of your portable batteries. They provide real-time data about the battery’s voltage, helping you understand its current state. Here are some reasons why using voltage meters is beneficial:
- Accuracy: Voltage meters give precise readings, ensuring you always know the exact power level.
- Prevent Overcharging: By monitoring the voltage, you can prevent overcharging, which can damage the battery.
- Extend Battery Life: Proper voltage monitoring helps maintain the battery’s health, extending its lifespan.
Using a voltage meter is simple. Connect the meter to the battery terminals and read the displayed voltage. Typically, a fully charged 12V battery should read around 12.6 to 12.8 volts. If the reading drops below 12 volts, it’s time to recharge the battery.
Consider using digital voltage meters for more accurate readings. These devices often come with additional features such as:
- Backlit Display: Easy to read in low light conditions.
- Multiple Measurement Modes: Measure voltage, current, and resistance.
- Compact Design: Easy to store and carry.
Indicators And Alerts
Indicators and alerts are crucial for effective power level monitoring. They provide real-time notifications about the battery status, ensuring you are always aware of the power levels. Here are some common indicators and alerts to consider:
- LED Indicators: Many portable batteries come with built-in LED indicators that show the power level. These indicators usually have different colors for different power levels (e.g., green for full, yellow for medium, red for low).
- Audio Alerts: Some advanced battery systems include audio alerts that warn you when the power level is critically low. This feature helps prevent sudden power loss.
- Mobile App Notifications: Certain smart batteries are compatible with mobile apps that send notifications directly to your smartphone. These apps provide detailed information about the battery status, including charge cycles and health.
Using these indicators and alerts effectively involves regularly checking the battery status and responding promptly to any warnings. For example, if your battery’s LED indicator turns red, it signals that the power level is low, and you should recharge the battery soon.
Incorporating these monitoring tools into your RV setup ensures your dashcams remain powered and functional, providing continuous security and peace of mind during your travels.
Optimizing Dashcam Settings
How to power dashcams with portable batteries in RVs is a common question among RV enthusiasts. One crucial aspect is optimizing dashcam settings to ensure efficient power usage and continuous recording. Proper settings can help you save battery life and ensure you capture important footage.
Power Saving Modes
Power saving modes are essential for extending the battery life of your dashcam. By adjusting these settings, you can reduce the energy consumption of your device, allowing it to run longer on your portable battery.
Here are some tips for optimizing power saving modes:
- Enable Sleep Mode: This mode turns off the display when the dashcam is not in use, reducing power consumption.
- Adjust Screen Brightness: Lowering the screen brightness can significantly save battery life.
- Turn Off Non-Essential Features: Features like Wi-Fi and GPS can drain the battery quickly. Disable them when not needed.
In some dashcams, you can schedule power saving modes to activate during specific times. This is useful if you know you won’t need the dashcam at certain hours.
Below is a table summarizing power saving options:
| Feature | Benefit |
|---|---|
| Sleep Mode | Reduces screen and system activity |
| Screen Brightness | Lowers energy consumption |
| Disable Wi-Fi/GPS | Extends battery life |
Loop Recording Features
Loop recording is a feature that ensures your dashcam continues to record even when the storage is full. It automatically overwrites the oldest footage, so you always have the latest video available.
To optimize loop recording:
- Set Appropriate Loop Length: Common lengths are 1, 3, or 5 minutes. Shorter loops save battery and memory.
- Use High-Capacity SD Cards: Larger memory cards allow more footage to be stored before overwriting occurs.
- Enable Event Detection: This feature protects important clips from being overwritten during an incident.
Loop recording helps manage storage space efficiently. It ensures the dashcam is always ready to capture new footage. Below is a table with loop recording settings:
| Setting | Recommendation |
|---|---|
| Loop Length | 3 minutes |
| SD Card Capacity | 32GB or higher |
| Event Detection | Enabled |
Optimizing these settings can help maintain a balance between recording quality and battery life. This way, your dashcam remains efficient during your RV travels.
Troubleshooting Common Issues
Powering dashcams in RVs with portable batteries can be a smart and flexible solution. It ensures continuous recording, even when the vehicle is off. Yet, this setup can face some issues. The most common problems include connection issues and battery life concerns. Let’s explore how to troubleshoot these issues effectively.
Connection Problems
Connection problems are one of the most frequent issues when using portable batteries to power dashcams in RVs. Here are some common causes and solutions:
- Loose Connections: Ensure that all cables are tightly connected. Check both the battery and the dashcam ports.
- Faulty Cables: Inspect the cables for any signs of wear and tear. Replace them if necessary.
- Incompatible Ports: Verify that the battery ports match the dashcam’s input. Using an adapter may solve this issue.
If the connections are still unstable, consider using a multimeter to test the voltage output from the battery. Here’s a simple table to help understand the expected voltage:
| Battery Type | Expected Voltage |
|---|---|
| Lithium-ion | 12V |
| Nickel-metal hydride | 9V |
If the voltage is lower than expected, the battery might be faulty. Replace the battery to see if the issue is resolved.
Battery Life Concerns
Battery life is another common issue. Here are some tips to manage battery life effectively:
- Adjust Dashcam Settings: Lower the resolution or frame rate to conserve power.
- Use Power-Saving Mode: Enable this mode if available. It reduces power consumption when the vehicle is stationary.
- Regular Charging: Ensure the portable battery is fully charged before long trips. Keep a spare battery as a backup.
Consider the battery capacity. Higher capacity batteries last longer but are heavier and more expensive. Here’s a brief comparison:
| Battery Capacity | Approximate Run Time |
|---|---|
| 5000mAh | 5-6 hours |
| 10000mAh | 10-12 hours |
If the battery drains quickly, check if the dashcam or other devices are drawing excessive power. Disconnect unnecessary devices to extend battery life.
Frequently Asked Questions
How Do I Power My Dashcam In An Rv?
You can power your dashcam in an RV using portable batteries. These batteries are convenient and easy to use. Ensure the battery capacity matches your dashcam’s requirements. Regularly charge the portable battery to keep your dashcam running without interruptions.
What Type Of Portable Battery Is Best For Dashcams?
Lithium-ion portable batteries are best for dashcams. They are lightweight, reliable, and have a long lifespan. Ensure the battery has enough capacity to power your dashcam for extended periods. Look for features like fast charging and multiple output ports.
Can I Use A Solar Panel With Portable Batteries?
Yes, you can use a solar panel with portable batteries. This setup helps keep your batteries charged while off-grid. Ensure your solar panel is compatible with your battery type. This method is eco-friendly and provides continuous power for your dashcam.
How Long Can A Portable Battery Power A Dashcam?
The duration depends on the battery capacity and dashcam power consumption. A 10,000mAh battery can power a dashcam for up to 10 hours. Always check your dashcam’s power requirements and choose a battery that meets those needs. Regular monitoring is essential to avoid power loss.
Conclusion
Powering dashcams with portable batteries in RVs is practical and smart. It ensures your dashcam runs continuously. No more worries about missing important footage. Choose the right battery for your needs. Install it carefully. Enjoy peace of mind on the road.
Protect your travels and memories. It’s simple and effective. Stay safe and capture every moment.


